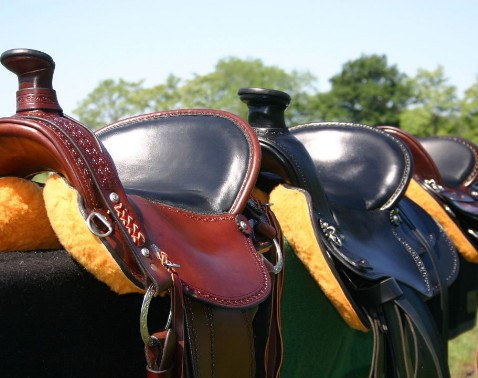

How to Measure for a Western Saddle
How to Measure Your Horse or Mule for Saddle Fit Before You Buy
Then buy a saddle that fits!
Properly fitting saddles is Crest Ridge Saddlery’s first objective!
Crest Ridge Saddlery offers saddles a bit differently than other companies. We are not here just to sell you a saddle. We want you to have a saddle that is correct for your horse and comfortable for you. We want you to tell your friends “this one fits!”
We can accomplish this with you by having correct measurements and good photos of your horse. These allow us to determine the saddle tree within our saddle lines that best accommodates the horse’s shape and size. We can get these measurements by your visiting us with your horse or mule in Lowry City, Missouri, at one of the shows we attend, or by your taking the required measurements and sending them to us.
Our saddle fitting system works equally well for stock horses, gaited horses, draft horses, mules and even zorses. We understand the differences between the breeds and know how to build a saddle that is perfect for your horse, regardless of breed.
Saddle fitting is easy with our system
We have developed a simple process which will provide us the information we need to recommend the proper tree to best fit your horse or mule.
Step 1: Build the saddle fitting measuring tool.
Cut a sixteen inch piece of stiff wire that can be easily molded to fit your horse’s shape and retain that shape when removed from the horse. Coated wires such as ROMEX or soldering wire work well. Mark the middle of the wire at the 8 inch point with a marker.
Step 2: Mold the saddle fitting measuring tool to your horse or mule.
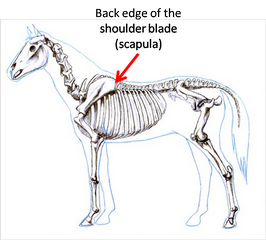
Stand your horse square on a level surface. With gentle pressure locate the back edge of the shoulder blade (scapula) with one or 2 fingers and keep them there. With your other hand place your measuring tool over the withers. Place the marked center point directly above the withers, with eight inches of wire to each side, and directly over where your fingers are marking the back edge of the scapula. Mold and press the wire down so that it makes a perfect outline of your horse's wither. It must make contact with the horse’s skin on both sides immediately behind the shoulder blade.
Free movement of the scapula is essential for a properly fitting gaited horse saddle
Step 3: Measuring your horse or mule
Carefully remove the measuring tool from your horse or mule
so that the shape of the animal is maintained by the tool. Lay the diagram on a sheet of paper and trace the wire as shown to the right. We use the measurements indicated by the two dashed lines. From the center of the wire measure straight down 3 inches and then side to side. This gives you the gullet measurement. Then measure from wire end to wire end straight across and this gives you the bar width through the shoulder. Record these 2 measurements, as we will need them to determine the required flare, bar angle, bar width and swell height needed for a proper fitting tree for your horse or mule.
The Importance of Accurate Photos and Templates
Step 4: Photograph your horse or mule
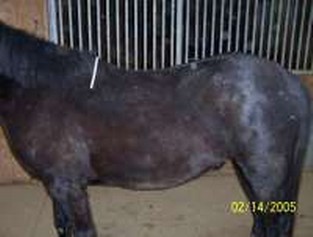
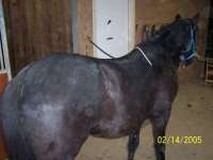
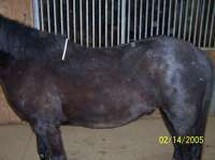
Photos that you send help us evaluate what bar shape, rock, as well as the angle needed to build the properly fitted tree. It is vital that you send photos from the correct angles requested. The horse must be standing square on all 4 feet and his head straight and not lowered or in the grazing position.
With your animal standing square on level ground, take three photographs as shown below. It is not necessary for your measuring tool to be on your animal for these pictures—it is challenging enough to get your horse to stand square and still without having to worry about a piece of wire staying in place. These pictures help us determine the appropriate rocker for your animal and to spot potential fitting issues, such as a prominent spine. Please do your best to replicate these photos.

Please do not send us photos that contain more than 1000kb (1mb) each as during your fitting E-mails larger than 4MB will not be delivered to me. Please send your photographs as .jpg files. I need to be able to flip from one to the other to accurately work with your information. Please do not send more photos than what we ask for. While we appreciate the albums of photos that we often receive, it is very difficult and time consuming to flip through duplicate images and odd angles. If we require additional photos, we will request them.
Step 5: Determine your seat size.
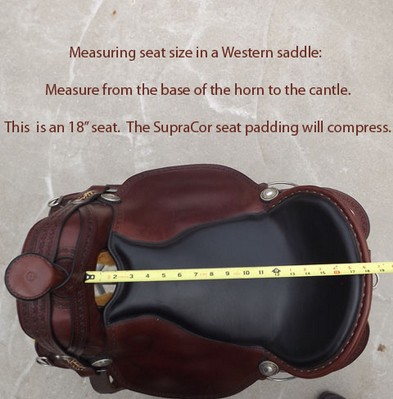
Seat size is an important aspect of saddle fit. Many people know what size seat they are comfortable in, but here are some guidelines in determining seat size. You should be able to lay your hand flat behind the swell (pommel), with your hand touching the swell and almost touching your pants. Your legs should have two inches of clearance from the swell as they are hanging down.
The rider's position in the saddle greatly influences how well a saddle fits. A rider in a saddle with too large of a seat cannot help but slide back and forth in the seat. Over time this will cause the saddle to move out of its proper position. If the rider slides to far back, the saddle will lift up in front transferring all of the weight to the rear of the saddle, potentially causing pressure points. If the rider is pushed too far forward, all of the riders weight is transferred to the shoulders.
Step 6: Send us your information.
Send us the photographs and the tracing of the wire along with the measurements from Step 3. You can send it in by e-mail or regular mail. We’ll have enough information to help recommend an appropriate tree for your horse or mule.
Optional: Build a Back Map
For difficult to fit horses or to build a comprehensive fitting aid for yourself, go to our "How to Build a Back Map" page which expands upon the one wire system detailed above. We occasionally have asked customers to build a back map for us and decided to share the more comprehensive instructions with all of our customers.